The Finished Project
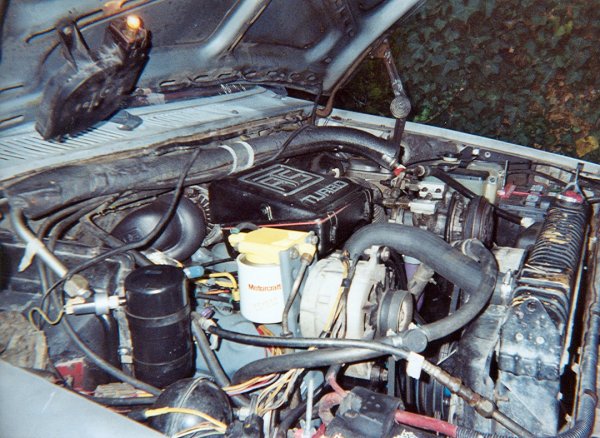
The engine compartment as of the completion of the project. I still need wire loom to completely clean up the "rat's nest" on the passenger's side inner fender, and there are still a few other minor things to do, but this is a picture of a running 6.9l. :)

A second shot of the completed project. The air conditioning even works (so far)! :) I sanded the air filter housing down to bare metal, painted it black, then used a palm sander to sand the raised lettering back down to bare metal. After doing that, I painted a clear coat over the whole thing. I think it came out pretty good.

The interior, with various parts installed. This time, I got smart enough to label things using PaintShopPro. The bezel surrounding the instrument panel was replaced with one off of a truck that was being parted out (Cops46's truck for those of you on TDS who remember that). The owner of that truck had installed gauges where I put the pyro and turbo boost, and the resulting holes gave me the idea to follow suit. The gauge location works quite well.
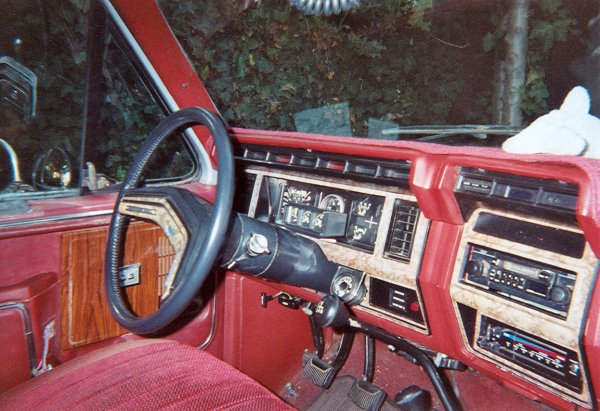
A second shot of the interior. I need to replace the radio and both door panels, but otherwise, things are actually in fair shape. The bench seat's in good condition, but leans too far back for me to be abel to be comfortable. So, I need to replace the seat someday...preferably with bucket seats. The stuffed animal on the dash is a shark, and is a family tradition. My dad had an alligator on the dash of his truck, my mom has a dolphin on the dash of her car, and I have a harbor seal on the dash of my Benz. These aquatic animals make great navigators! ;) You can just barely see the knob that's attached to the high-idle cable, nestled in between the parking brake release handle and the hood release handle. Note the set parking brake; it's my philosophy that no one should rely solely on a transmission to keep a parked vehicle stationary. End of speech.
Removing external parts and accessories
Heads, gaskets, and the block after head removal
Removing timing gear cover and camshaft
Cleaning the ins and outs of the engine
Final engine block cleaning with compresed air
Assembling and testing the oil cooler
First steps of modifications for the turbocharger
Comparing the stock head bolts to ARP studs (lengthy!)
Installing the intake manifold and injector pump
Assembling and installing the turbocharger
Last touches on engine assembly
The Finished Project