
Re-installing the Camshaft
Lesson learned: Thou Shalt Not try to install the camshaft drive gear while the camshaft's in the engine! The thrust washer pointed out in the picture is supposed to be snug between the first cam bearing and the spacer separating the thrust washer from the fuel pump eccentric. It should be snug enough to keep the thrust washer from moving forward-to-backward any, but should allow the thrust washer to spin. The thrust washer, in turn, is bolted to the engine block, and is meant to keep the camshaft from moving forwards of backwards in relation to the engine. Hammering on the cam drive gear, as I had been, started making the thrust washer push against the spacer (which is pressed on) enough to start pressing the spacer out. This made the cam move almost 1/4" front-to-back. Very scary! Fortunately, a friendly machine shop charged me $25 to press everything (including the cam drive gear, thank goodness) back into their proper position.
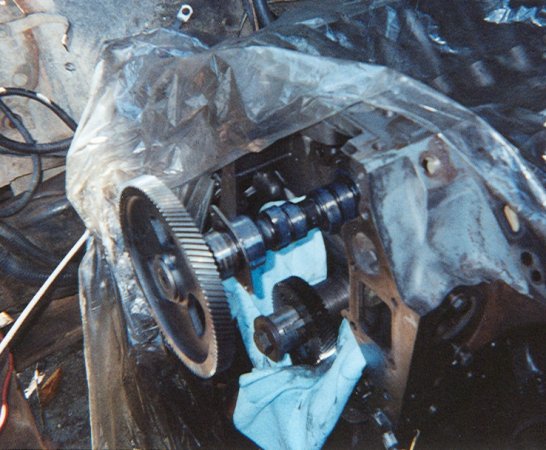
Here, after re-cleaning the cam and re-coating everything with engine assembly lube, I am installing the camshaft for the second time. This time, once it was installed, everything went well.
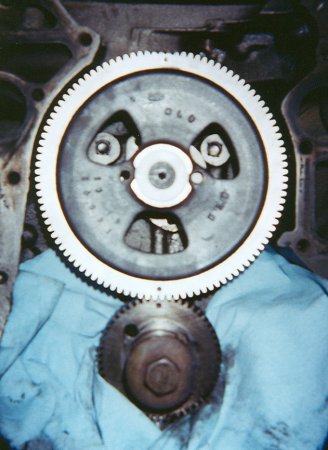
Picture proof that the timing marks on the camshaft drive gear and on the crankshaft drive gear are aligned as they're supposed to be. I will take a similar picture after installing the injector pump drive gear. You can also see here the three large holes in the cam drive gear that I was able to, with the crank turned the right amount, insert a socket and extension to properly tighten the thrust washer bolts.
Removing external parts and accessories
Heads, gaskets, and the block after head removal
Removing timing gear cover and camshaft
Cleaning the ins and outs of the engine
Final engine block cleaning with compresed air
Re-installing the camshaft
Assembling and testing the oil cooler
First steps of modifications for the turbocharger
Comparing the stock head bolts to ARP studs (lengthy!)
Installing the intake manifold and injector pump
Assembling and installing the turbocharger