Introduction
This page, and the project itself, is dedicated to Richard Thomas Jean. I suspect he would have approved of what I'm doing to his truck. Uncle Richard, I wish you could have seen this.
When I first took ownership of the truck in June 2001, I also owned a Ford E-350 van that was also powered by a 6.9l diesel. I immediately noted the difference in engine sounds between the two. The van sounded like a properly-running four-stroke V-8 diesel, while the truck's engine note could better be compared to a Detroit 6-71 2 stroke tractor-trailer engine!
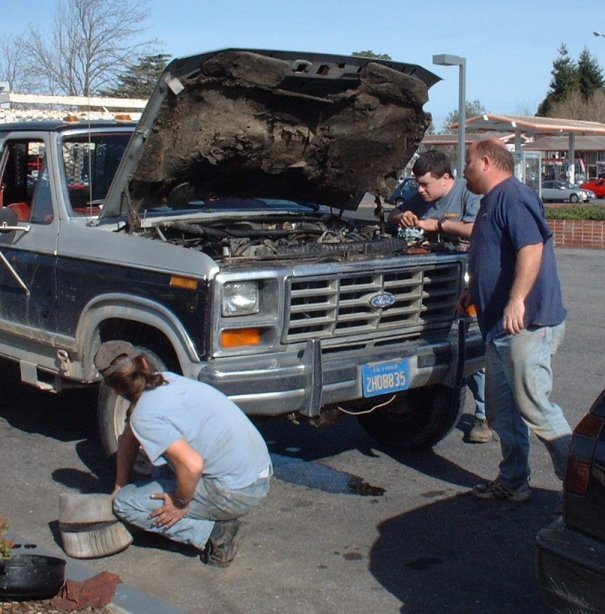
Thinking that the truck's injection timing wasn't set properly, I let things go as they were until the truck's fuel injector pump died in March 2002 (pictured below is a group of us trying to troubleshoot the truck the day the pump died).
Upon installation of a replacement pump in June of that year, I came across two unpleasant discoveries. First, on attempting to have the injection timing set with the proper equipment, I found that a part of the mount for the timing probe had broken off. Second, even with the timing set as close as possible by ear, the truck still knocked as if the injection timing was too far advanced.
I continued to operate the truck in this manner, due to financial and time constraints. I was able to acquire a set of rebuilt Delphi fuel injectors in 2003, and finally installed them in January 2004 after having both this set and the original set tested.
With the new injectors installed and the timing tweaked slightly, I was able to make the engine somewhat quieter, although it still wasn't right. I also found that I was hearing a woofing sound from the engine intake with the air cleaner removed. I conducted an engine compression check, and all cylinders looked to be healthy. This led me to believe that there was one or more hydraulic lifters that were not holding pressure and was therefore not opening a valve all the way.
Thus, this project was born!
My original intent was to remove the hydraulic lifters and the timing gear cover to inspect and replace (the timing gear cover was to be replaced with one that had a complete mount for the timing probe). However, I came to three realizations. First, by the time I got to the lifters, removing the cylinder heads was only one step further. Second, I have a friend who was taking an auto shop class at the time who could rebuild and test the cylinder heads for the cost of parts. Third, failed hydraulic lifters tend to seize up the roller bearing on the bottom, which can wipe out the corresponding lobe on the camshaft.
Given these factors, coupled with the knowledge that cylinder head gaskets on the 6.9l engine fail on occasion, I decided to go one step further and remove both of the cylinder heads and the camshaft. Since I had already agreed to use my truck to help people with things in April and May 2004, I decided to delay the project until June. An unexpected opportunity resulted in me acquiring a turbocharger to add to the project. This delayed the project somewhat, but was well worth it. :) I also found other things that ought to be done, with this downtime providing a good opportunity to do so. This included replacing the O-rings on the oil cooler, flushing the cooling system, repairing a leak in the power steering system, repairing the air conditioning system, and thoroughly cleaning as much of the engine compartment as possible.
The project was finished, and the truck was fired up for the first time, on September 25th, 2004.
Special thanks to:
Introduction to the project
Removing external parts and accessories
Heads, gaskets, and the block after head removal
Removing timing gear cover and camshaft
Cleaning the ins and outs of the engine
Final engine block cleaning with compresed air
Assembling and testing the oil cooler
First steps of modifications for the turbocharger
Comparing the stock head bolts to ARP studs (lengthy!)
Installing the intake manifold and injector pump
Assembling and installing the turbocharger
Last touches on engine assembly
Please Contact Administrator with any comments, questions, or concerns.

View My Guestbook
Sign My Guestbook
Page updated February 13th, 2005

Page best viewed with Mozilla FireFox.