Removing and Installing the Starter on an IDI
I did not get a chance to take any pictures of removing the old starter out of my 6.9l, but it is essentially the opposite of installing the replacement. There are a couple of things to keep in mind regarding diesel starters. First, they are considerably heavier than what is typically seen on a gasoline engine, so be prepared for this (note that, if you know what to expect, it's not a big deal). Second, after putting the new starter in (or even with an old starter that hasn't failed), it is CRITICAL to be cautious about how long you allow the starter to crank. More so than others, diesel starters tend to get very hot very quickly, and if you allow the starter to crank for more than 30 seconds or so at one time, the starter is likely to overheat and fail prematurely. If the engine doesn't start in 30 seconds, it is ideal to allow the starter to "cool off" for 1 to 2 minutes before cranking for another 30 seconds.
The 6.9l starter is held on by three bolts. These bolts go into the adapter that allows the engine to mate to the transmission, and everything is done from the engine side, on the passenger's side of the vehicle, from underneath. It should go without saying that the battery cables need to be disconnected from both batteries prior to working with the electrical connections on the starter.

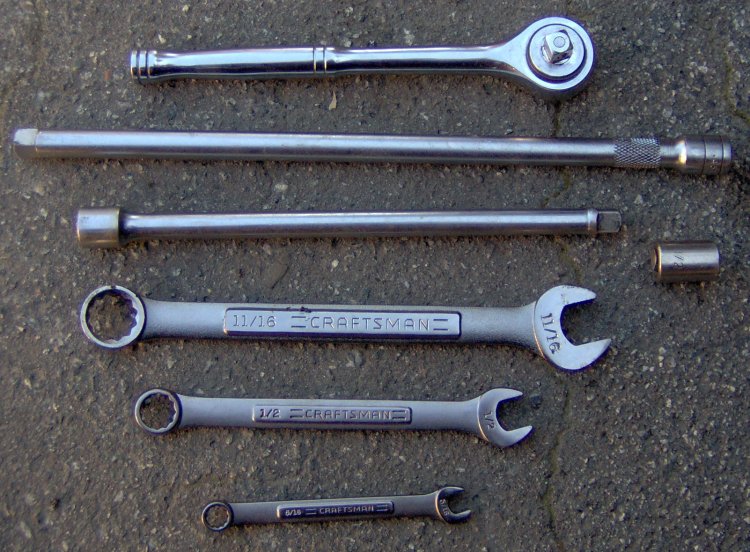
These are the tools I used to remove and replace the starter in my truck. I believe I used the longer of the two extensions for the top bolt, and the shorter extension for the other two. The 5/16" wrench is for the nut holding the small wire to the solenoid terminal; the 11/16" wrench is for the nut holding the battery cable to the solenoid terminal. The starter mounting bolts require a 1/2" socket or wrench, and I used the wrench and socket alternately depending on which worked best for what I was doing.
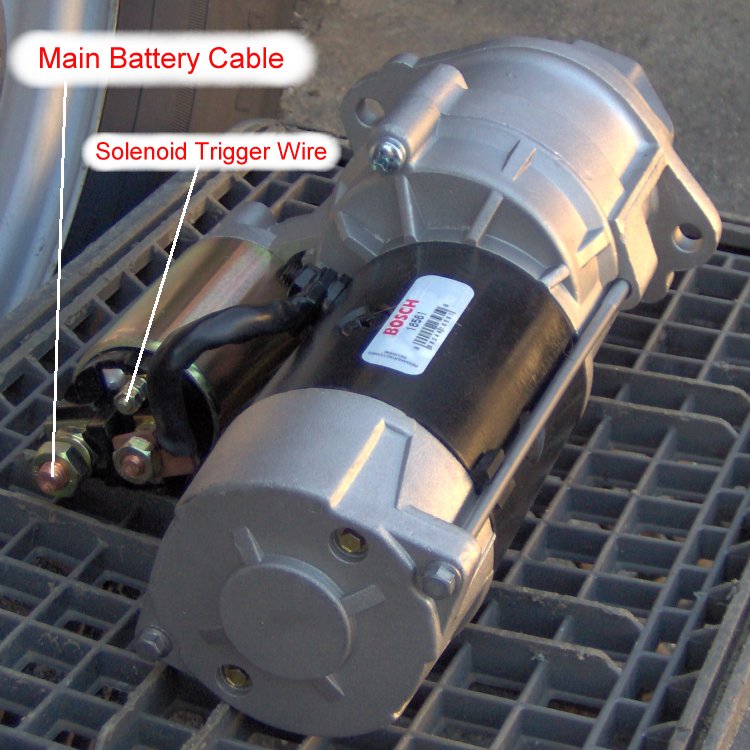
Here is the replacement starter, ready to go into the engine. Notice that the actual starter motor is offset from the Bendix housing. This is a gear-reduction starter, and I would strongly recommend investing in one. Gear-reduction starters for the IDI are built by Mitsubishi, Nippondenso, and Bosch. The faster the starter can spin an engine (especially a diesel engine that relies on heat in the combustion chamber to start), the easier the engine starts. Gear-reduction starters give a far superior cranking speed as compared to the less expensive direct-drive starters available (Delco, Exide, etc), making for easier starts and less wear and tear overall. This is a Bosch rebuilt starter. Note the markings for which wire goes where on the solenoid.
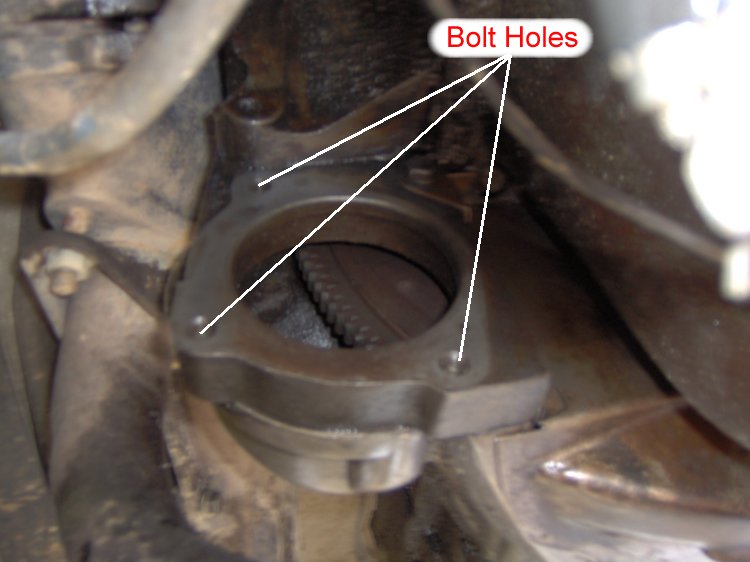
The hole in the bellhousing that the starter goes into. Note the three bolt holes visible in the picture. The one on top is very difficult to see while the starter is installed on the engine, and is not easy to get to. I found that it's best to use one hand to feel for the bolt, and once it's found, use that hand to guide a socket (with an extension long enough to clear the starter entirely) onto the bolt head, using the other hand to control the extension. It'll be necessary to find an extension or a series of extensions that are long enough to clear the starter without being so long that the ratchet hits the frame crossmember in front of the starter (see picture below for what I mean about the crossmember). It's a delicate balance. The other two bolts, fortunately, are easy to access.
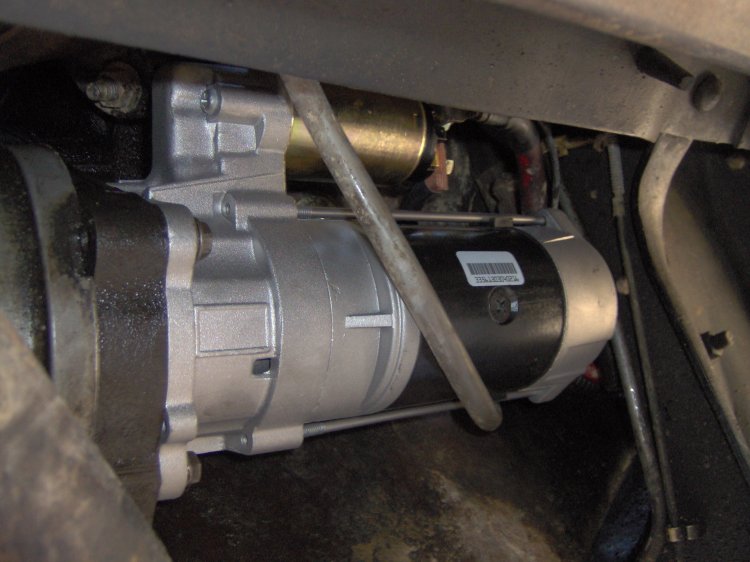
The installed starter, as viewed from the side. Note the frame crossmember (with the fuel lines going to the lift pump visible) right behind the starter. Gear-reduction starters are long enough that it can be difficult to manipulate the starter in between the crossmember and the adapter plate. It CAN be done; it just takes some wiggling and playing around. It might get a bit frustrating while holding the starter up from under the truck, though. The clear hose going around the starter is for my block drain petcock. With the starter installed, I found it easier to leave the hose in place than trying to get the hose onto the end of the petcock with the starter in the way.
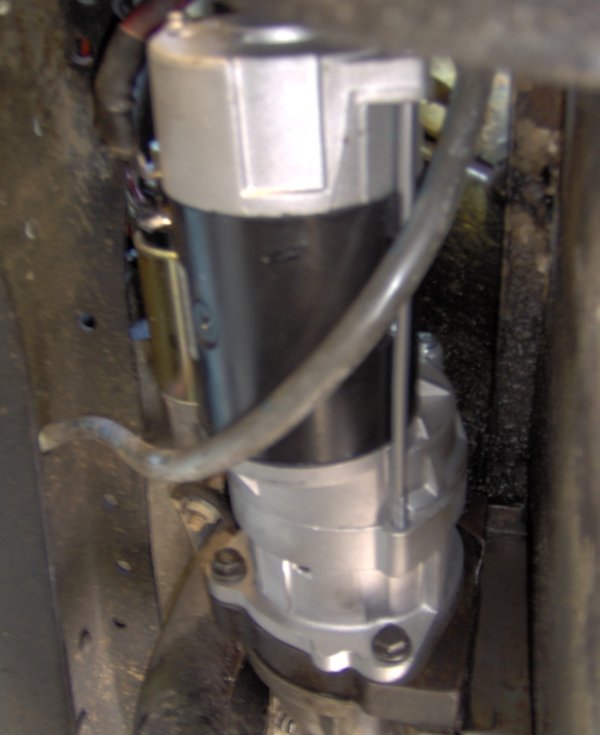
The installed starter, as viewed from the bottom looking straight up. You can see the lower two bolts and how easy it is to access them. It might be necessary to use a wrench on them, though. There shouldn't be anything underneath the starter that's mounted to the truck, so other than maneuvering the starter out of the hole into the bellhousing and around the crossmember, removing and installing the starter is a very straightforward process.
Back to main Ford page
Page updated November 13th, 2005